How to Fix a Loose Laptop Hinge Without Replacing the Screen

If you own a business-class laptop from the 2012–2019 window—ThinkPad T/X/W/P, Dell Latitude 5000/7000, HP EliteBook 800—you already know the hinge is a structural load-bearing part, not a cosmetic one. A loose hinge means the lid flops, the bezel flexes, and eventually the display cable or the panel itself takes damage. The usual advice is to replace the entire screen assembly, which is wasteful and expensive. On many of these machines, the hinge can be repaired at the component level with basic tools, patience, and a schematic or boardview file if you have one. This article covers the repair path I use in the workshop: diagnosing the failure mode, tightening or rebuilding the hinge, and reinforcing the mounting points so the repair lasts longer than the original design.

This matters because these laptops are still worth repairing. A Latitude 7490 or a ThinkPad T480 with a broken hinge is not e-waste; it is a machine with a known failure point and a documented fix. The anti-repair design choices—threaded brass inserts pressed into plastic, hinge nuts that loosen over time, adhesive strips that tear the bezel—are annoying, but they are not unbeatable. If you have a schematic or boardview file, you can also verify which screws are structural and which are just holding plastic trim, which saves time and prevents cracked bezels.
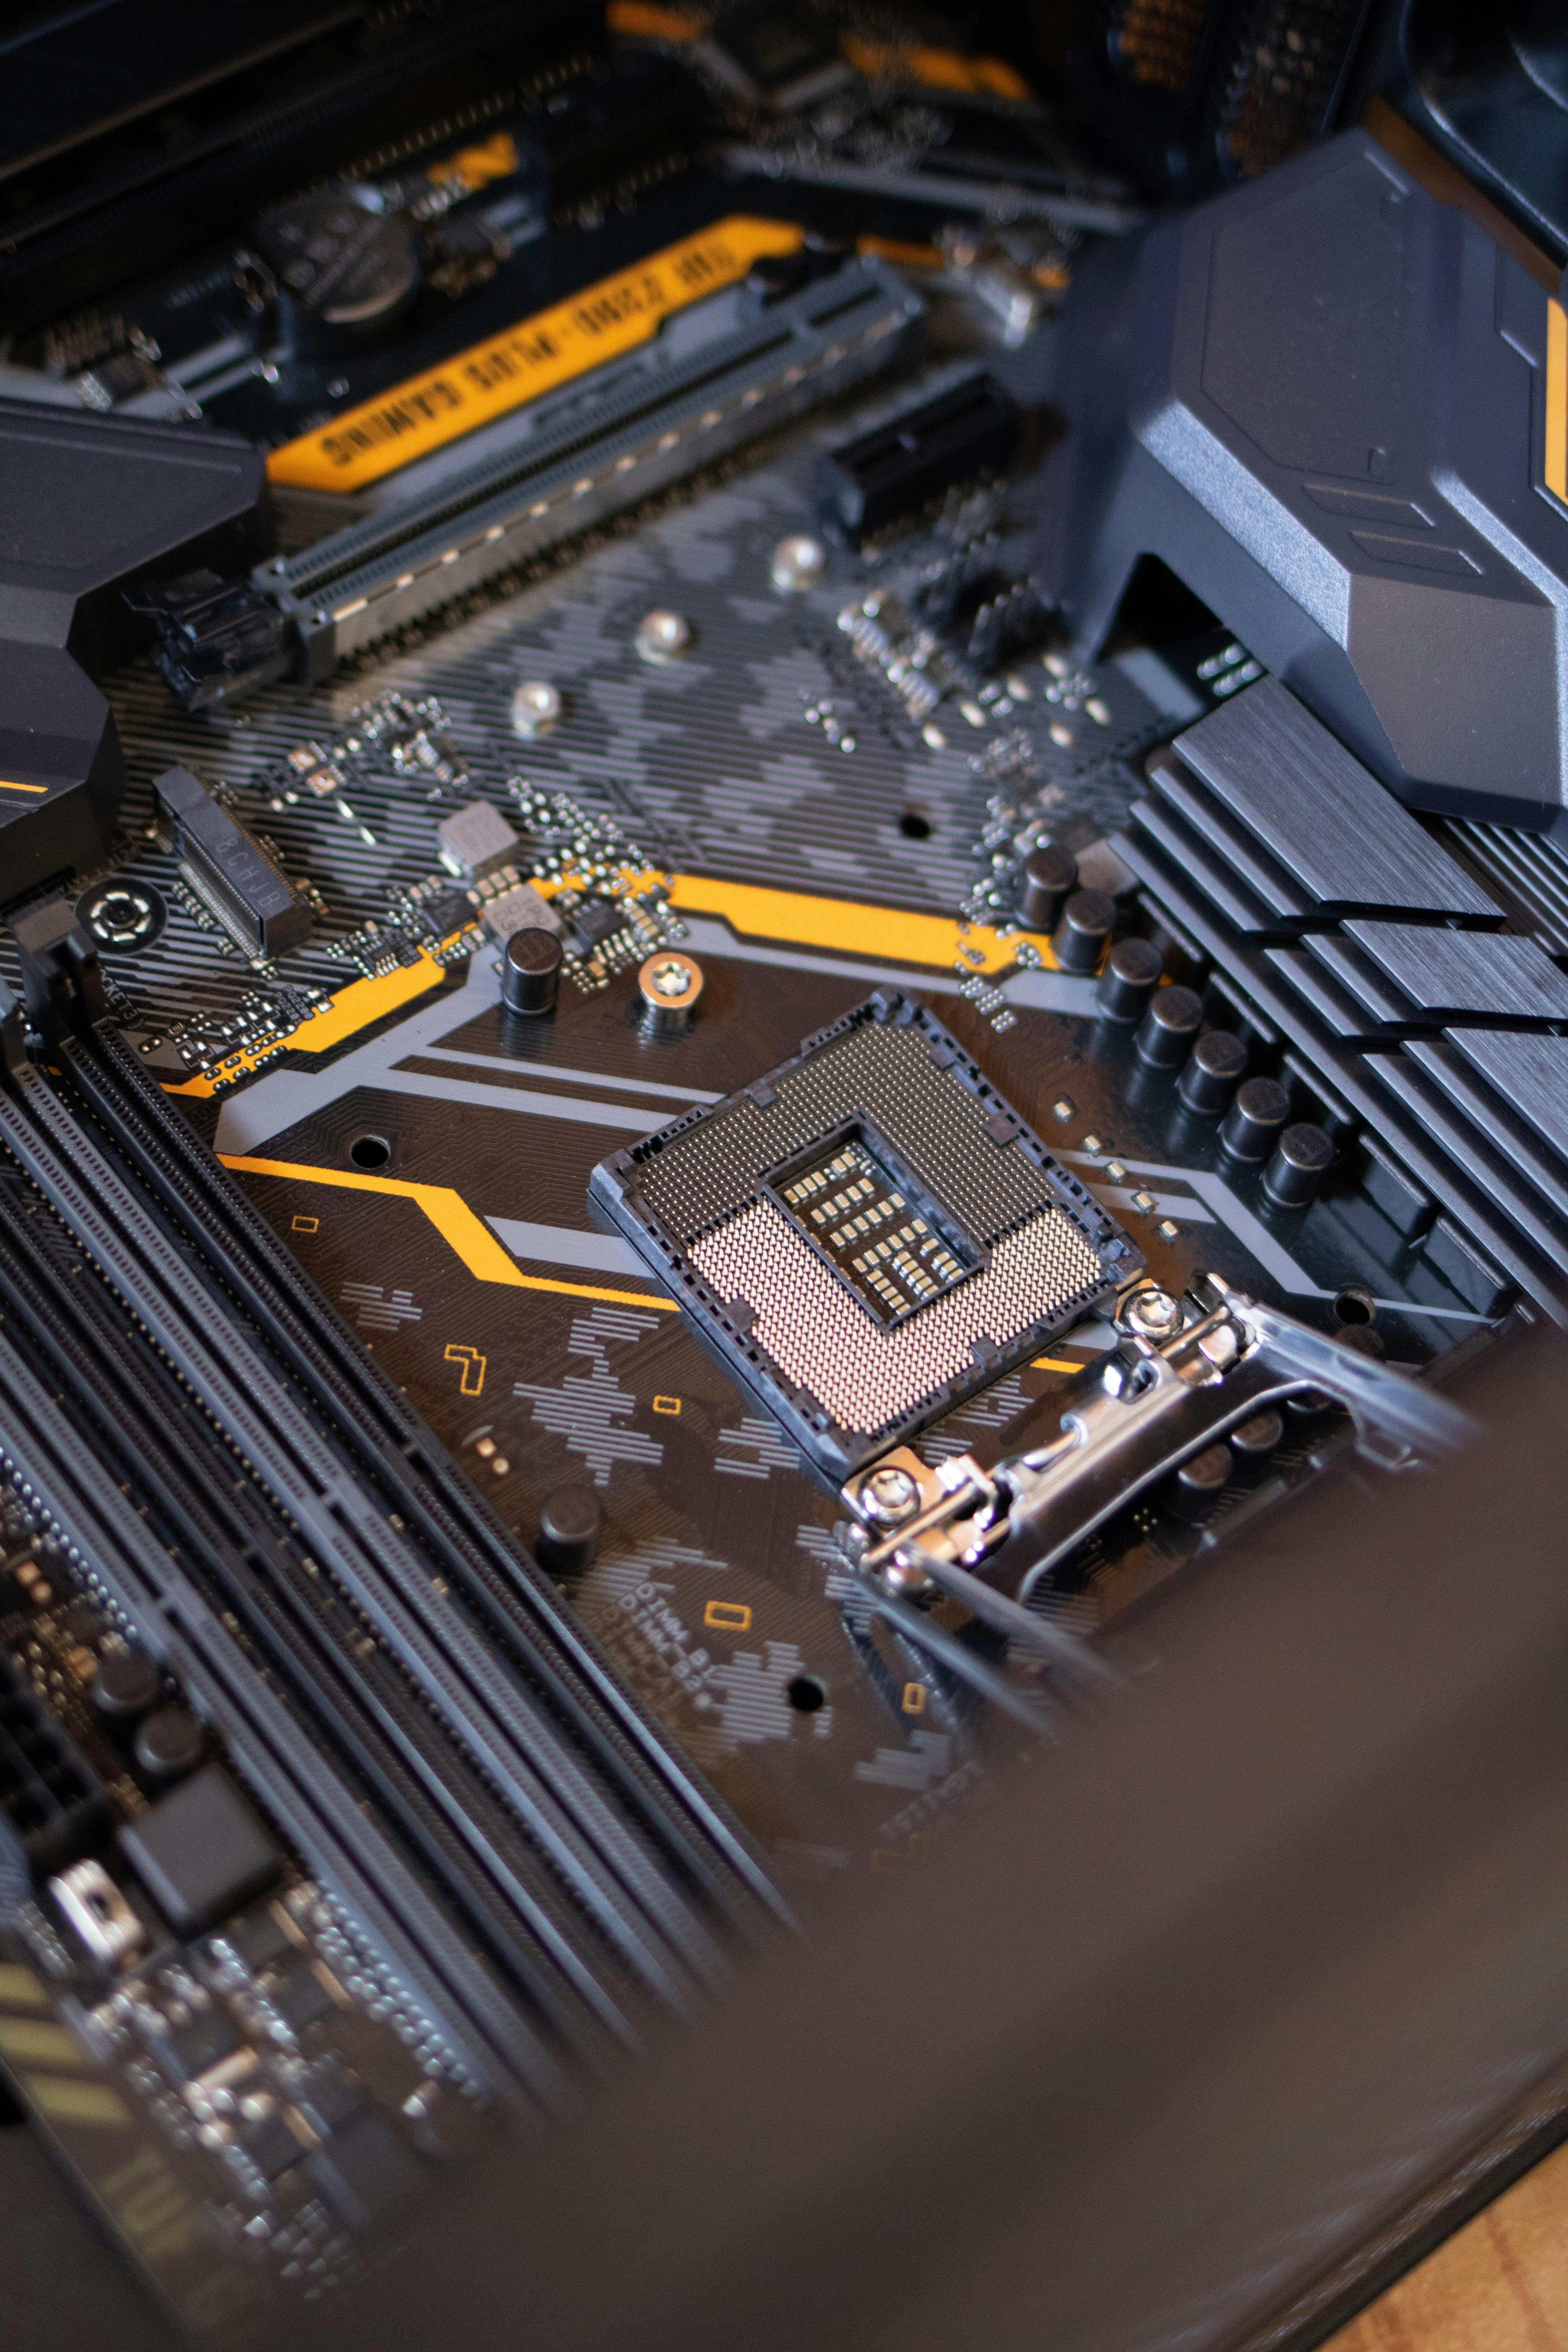
Disassembled business laptop showing exposed hinge mechanism and internal components on a workbench

Diagnose the Hinge Failure Before You Buy Parts

A loose hinge is not always the same failure. On these business laptops, I see three common modes:

  • Loose hinge nut or screw: The hinge itself is fine, but the screw that attaches the hinge to the lid or base has backed out. This is the easiest fix and often the most common on ThinkPad T-series and Dell Latitude 5000/7000 models.
  • Worn hinge friction mechanism: The metal leaves inside the hinge have lost tension. The lid moves too freely or sags. This requires rebuilding or replacing the hinge, not just tightening screws.
  • Broken mounting point: The brass insert or plastic boss that holds the hinge screw has cracked or stripped. This is the failure that usually leads people to replace the whole screen assembly, but it can be repaired with epoxy, a threaded insert, or a backing plate.

Open the laptop and inspect the hinge area before ordering anything. On a ThinkPad T480, remove the bottom cover and look at the hinge screws that go into the base. On a Dell Latitude 7490, the hinge screws are under the bottom cover and sometimes under the keyboard bezel. On an HP EliteBook 840 G5, the hinge is partially hidden by the display bezel, so you may need to remove the bezel to see the lid-side mounting points. If you have a boardview file, use it to identify which screws are load-bearing and which are just for trim. This prevents you from overtightening a cosmetic screw and cracking the plastic.

Tools and Materials You Actually Need

You do not need a full electronics lab. For most hinge repairs on these models, the following is enough:

  • Precision screwdriver set with Phillips #00, #0, and #1 bits, plus Torx T5 and T6 for some Dell and HP models.
  • Plastic spudger and a thin metal pry tool for bezels.
  • Isopropyl alcohol (90% or higher) and cotton swabs for cleaning old threadlocker and adhesive.
  • Blue threadlocker (Loctite 242 or equivalent) for screws that keep backing out.
  • Two-part epoxy (JB Weld or similar) for rebuilding stripped plastic bosses.
  • Small brass or steel threaded inserts if the original insert is destroyed.
  • A heat gun or hair dryer for softening adhesive on bezels and hinge covers.
  • Anti-static mat and wrist strap if you are working near the motherboard.

If the hinge friction mechanism itself is worn, you may need a replacement hinge. These are often available as used pulls from the same model. Check the part number on the hinge or in the service manual. For ThinkPads, the HMM (Hardware Maintenance Manual) lists hinge part numbers. For Dell and HP, the service manual or parts list does the same. Avoid generic “compatible” hinges from unknown sellers; the tolerances are often off, and the lid will not close evenly.

Precision screwdriver set and repair tools laid out next to an open laptop

Step-by-Step: Tighten and Reinforce the Hinge Mounts

This is the repair I do most often. The hinge is not worn; the screws have simply loosened or the plastic boss has started to crack. The goal is to restore clamping force and add reinforcement so the failure does not return in three months.

1. Remove the battery and discharge residual power

Always disconnect the battery first. On a ThinkPad T480, there are two batteries: an internal one and an external one. Disable the internal battery in the BIOS or disconnect it from the board. On a Dell Latitude 7490, remove the bottom cover and disconnect the battery cable. On an HP EliteBook 840 G5, the battery connector is under the bottom cover. This is not optional; a shorted screwdriver near the hinge can kill the board.

2. Expose the hinge screws

For base-side hinge screws, remove the bottom cover. For lid-side screws, you may need to remove the display bezel. On many ThinkPads, the bezel is held by plastic clips and a few screws under rubber pads. On Dell Latitudes, the bezel is often adhesive-backed; use a heat gun on low and a plastic spudger. On HP EliteBooks, the bezel is clipped and sometimes has screws under the hinge covers. Work slowly. A cracked bezel is a cosmetic problem, but it also weakens the lid structure.

3. Inspect the mounting points

Look at the brass inserts and plastic bosses. If the insert is spinning in the plastic, the boss is stripped. If the screw is loose but the insert is solid, clean the screw and the insert with isopropyl alcohol, apply a small drop of blue threadlocker, and tighten to the specified torque. On these laptops, hinge screws are usually M2 or M2.5 with a torque spec around 0.3–0.5 N·m. Do not overtighten; the brass insert will pull out of the plastic.

4. Rebuild stripped bosses

If the boss is cracked or the insert is loose, remove the insert if possible. Clean the area with alcohol. Mix a small amount of two-part epoxy and fill the boss cavity. Press the insert back into place, or install a new threaded insert if the original is damaged. Let the epoxy cure fully—usually 24 hours for full strength. If the boss is completely gone, you can build a new one with epoxy putty, but this is more involved. On some Dell Latitude models, the hinge mount is a metal bracket that screws into the lid; if that bracket is bent, straighten it or replace it.

5. Reassemble and test the lid movement

Reattach the hinge screws with threadlocker. Reassemble the bezel and bottom cover. Open and close the lid slowly. The resistance should be even on both sides. If one side is tighter than the other, loosen the screws slightly and adjust. A misaligned hinge will crack the bezel or damage the display cable over time.

When the Hinge Friction Mechanism Is Worn

Sometimes the screws are tight, but the lid still flops. That means the friction mechanism inside the hinge has lost tension. On most business laptops, the hinge is a sealed unit with a metal leaf spring and a friction plate. You can sometimes rebuild it, but it is fiddly. The easier path is to replace the hinge with a used original part.

To replace the hinge, follow the same disassembly steps. Remove the old hinge from the lid and base. Note the routing of the display cable and antenna wires; they often run through or near the hinge. Install the new hinge and tighten the screws to spec. Test the lid movement before reassembling the bezel. If the new hinge is too stiff, work it back and forth a few times to break it in. If it is too loose, return it; a used hinge with worn friction is no better than the one you removed.

Reinforcing the Lid and Base Mounts for Long-Term Durability

The original design often fails because the plastic boss is too thin or the brass insert is too small. After repairing the hinge, you can add reinforcement to prevent a repeat failure. On ThinkPad T-series and X-series models, the lid-side hinge mounts are often metal brackets screwed into the lid frame. If those screws are loose, the bracket flexes and the hinge feels loose. Tighten them and add a small amount of threadlocker. On Dell Latitude 5000/7000 models, the base-side hinge mounts are sometimes part of the palmrest assembly. If the palmrest is cracked, you can reinforce it with a thin metal plate epoxied behind the mount. On HP EliteBook 800 series, the hinge mounts are usually metal, but the screws that hold the hinge to the lid can strip the threads in the metal bracket. In that case, use a slightly longer screw or a threaded insert.

One trick I use on many models: add a thin nylon washer under the hinge screw head. This spreads the load and reduces the chance of the screw pulling through the plastic. It also makes the hinge feel slightly smoother. The washer must be thin enough that the screw still engages fully; a 0.5 mm washer is usually safe.
Close-up of a laptop hinge being tightened with a precision screwdriver

Common Mistakes That Turn a Hinge Repair into a Screen Replacement

I have seen too many laptops come into the workshop with a cracked bezel or a damaged display cable because someone tried to fix a loose hinge without understanding the failure mode. Here are the mistakes to avoid:

  • Overtightening the hinge screws. The brass insert will pull out of the plastic boss, and then you have a bigger repair.
  • Using super glue instead of epoxy. Super glue is brittle and will fail under the repeated stress of opening and closing the lid.
  • Forcing the bezel off without heat. On adhesive-backed bezels, cold removal cracks the plastic and tears the adhesive strips.
  • Ignoring the display cable routing. If the cable is pinched between the hinge and the lid, it will eventually short or tear.
  • Replacing only one hinge. If one hinge is worn, the other is usually not far behind. Replace both if the budget allows.

What This Repair Teaches You About the Machine

Fixing a loose hinge is a gateway repair. Once you have the bezel off and the hinge exposed, you can see how the display cable is routed, where the antenna wires run, and how the lid frame is constructed. That knowledge transfers to other repairs: replacing a display panel, fixing a broken lid latch, or rerouting a damaged antenna cable. On these business laptops, the hinge area is also a common place for cable damage. If your Wi-Fi signal is weak or the webcam flickers, the cable may be pinched near the hinge. A hinge repair is a good time to inspect and reseat those cables.

If you have a schematic or boardview file, you can also trace the display connector and the backlight circuit. That is useful if the screen goes dark after a hinge repair because a cable was damaged. The boardview will show you which pins carry the backlight power and which are data lines, so you can test continuity with a multimeter before ordering a new cable.

FAQ: Loose Laptop Hinge Repair

Can I fix a loose laptop hinge without replacing the screen?

Yes, in most cases. The hinge is a separate part from the screen assembly. If the screws are loose or the mounting boss is stripped, you can tighten or rebuild the mount without touching the panel. If the hinge friction mechanism is worn, you can replace just the hinge. The screen only needs replacement if the panel itself is damaged or the lid frame is cracked beyond repair.

How do I know if the hinge is loose or the screen is broken?

A loose hinge causes the lid to flop or wobble when you move the laptop. The screen may still display a perfect image. A broken screen shows cracks, lines, or no image. If the lid moves too freely but the display is fine, the problem is the hinge or its mounting points, not the panel.

What is the best glue for a stripped laptop hinge mount?

Two-part epoxy, such as JB Weld, is the best choice. It is strong, fills gaps, and bonds well to plastic and metal. Avoid super glue and hot glue; they are too brittle or too soft for the repeated stress of a hinge. Let the epoxy cure fully before reassembling.

Why does my laptop hinge keep coming loose after I tighten it?

The screw is likely backing out because the plastic boss is worn or the screw threads are stripped. Tightening alone will not fix the underlying problem. You need to rebuild the boss with epoxy or install a threaded insert, and use blue threadlocker on the screw to prevent it from loosening again.

Can I use a generic replacement hinge from an online marketplace?

I do not recommend it. Generic hinges often have different friction characteristics and mounting hole tolerances. The lid may not close evenly, or the hinge may be too stiff and crack the bezel. Use a used original hinge from the same model, or a new old-stock part from a reputable supplier.

Next Steps for Your Workshop

If this repair worked for you, the next logical step is to inspect the display cable and antenna wires while the bezel is off. On many ThinkPad T480 and Dell Latitude 7490 units, the cable is already showing wear at the hinge point. Replacing the cable now is cheaper than replacing the panel later. I will cover display cable replacement and routing in a follow-up article, including the specific cable part numbers for the most common models. If you have a particular model you want me to document, leave a note in the comments or send a message through the contact page.


How to Fix a Loose Laptop Hinge Without Replacing the Screen Assembly

Hinge failure on a laptop isn’t some vague, unfixable tragedy. It’s a mechanical breakdown, plain and simple. The friction joint—the metal-on-metal pivot that lets you tilt the screen—loses its bite, or the brass inserts molded into the plastic palmrest or lid tear out of their bosses. The industry’s go-to answer? Swap the whole lid assembly. That’s a $150+ overreaction for what’s usually a $10 problem. On business-class workhorses like the ThinkPad T440s, Dell Latitude E7450, or HP EliteBook 840 G3, the hinge is a separate, bolted part. The real damage sits in the magnesium or ABS anchor points. If you’ve got a screwdriver and a healthy distrust of planned obsolescence, you can fix this with epoxy, some threaded inserts, and a bit of patience.

Close-up of a technician's hands working on a disassembled laptop motherboard with a screwdriver

Diagnosing the Real Damage: Hinge vs. Mount vs. Friction Joint

Don’t mix epoxy until you know what you’re dealing with. A “loose hinge” is a symptom, not a diagnosis. On my bench, I see three distinct failures. First, the hinge itself can wear out—the metal-on-metal friction inside the barrel gives up, and the screen flops. This is rare on a ThinkPad T450s or Latitude E7470; Lenovo and Dell used steel hinges with decent detents. Second, and way more common, the threaded brass inserts in the lid’s back cover or palmrest strip out. You’ll see the screw spinning freely, or the plastic boss around the insert is cracked. Third, the hinge mounting bracket on the lid or base snaps, especially on magnesium alloy frames like the HP EliteBook 840 G2. One good drop can shear that metal tab clean off.

To diagnose, open the lid to 90 degrees and gently wiggle the screen corner. If the hinge arm moves but the screw heads stay still, the friction joint is shot. If the screw heads move with the hinge arm, the threads are stripped. If you hear crunching, the plastic boss is disintegrating. For the business-class machines we focus on—ThinkPad T, X, and W series; Dell Latitude 5000 and 7000; HP EliteBook 800 G1 through G5—the service manuals are publicly available. Grab the Hardware Maintenance Manual (HMM) for your model from Lenovo’s support site or Dell’s driver page. It’ll show you the exact screw layout and hinge assembly part number, which you’ll need if you eventually have to buy a replacement hinge bracket.

Tools and Materials You’ll Actually Need

Skip the “iFixit Pro Tech Toolkit” marketing. For this job, you need a few specific items that earn their keep in a component-level shop. A JIS #0 or #1 screwdriver is mandatory—Phillips bits will cam out and strip the soft zinc screws on ThinkPad hinges. Get a set of brass heat-set inserts (M2 and M2.5 are common for Dell and Lenovo) and a soldering iron with a flat tip to install them. For epoxy, I use JB Weld Original, not the quick-set stuff. You need the 24-hour cure strength and the ability to withstand the shear force of opening a lid 3,000 times. Other essentials: isopropyl alcohol (99%), cotton swabs, a small file, a clamp, and a pick set to remove bezel stickers without gouging the plastic.

Close-up of a technician applying epoxy to a laptop hinge mount with a small tool

Method 1: Rebuilding Stripped Bosses with Epoxy and Threaded Inserts

This is the most durable fix for stripped screw holes in the lid or palmrest, and it’s the one I use on 90% of the EliteBooks and Latitudes that come through the door. The factory brass insert has ripped out of the plastic boss, leaving a crater. You can’t just fill the hole with epoxy and screw into it—the epoxy will crumble under torque. You need to rebuild the boss and embed a new metal thread.

Step-by-Step: Epoxy Rebuild

First, remove the screen bezel. On a ThinkPad T480, this means peeling back the adhesive strips and releasing plastic snaps. On a Dell Latitude 7490, the bezel is a single-use sticker; you’ll need a new one or double-sided tape to reattach it. Disconnect the battery first—always. Once the bezel is off, unscrew the hinge from the lid. You’ll see the damaged boss. Clean the area with isopropyl alcohol. Mix the JB Weld and pack it into the stripped hole. Before it sets, press a new M2 or M2.5 brass insert into the epoxy, aligning it with the hinge bracket. Let it cure for a full 24 hours under clamp pressure. The next day, file away any excess epoxy that blocks the hinge bracket, then reassemble. This fix outlasts the original plastic.

When the Boss Is Completely Gone

On some HP EliteBook 840 G3 lids, the plastic boss shatters entirely. You’re left with a flat magnesium surface. Here, you can’t just fill a hole—you need to create a new anchor point. I use a two-part approach: first, build a new boss from JB Weld around a sacrificial screw coated in release agent (petroleum jelly works). Let it cure, remove the screw, and you have a threaded hole. For extra strength, embed a small piece of fiberglass mesh into the epoxy. This is a messy, ugly repair, but it’s hidden under the bezel and hinge cover. It’s also the difference between a $150 lid replacement and a $10 tube of epoxy.

Method 2: Tightening the Hinge Friction Joint

If the hinge itself is loose—the screen flops but the mounting screws are tight—you can sometimes restore tension. This is more common on older ThinkPad T420 and T430 models, where the hinge is a separate, serviceable unit. Remove the hinge from the laptop. You’ll see a nut on the pivot pin. Tighten it slightly with a socket or adjustable wrench. A quarter-turn is often enough. Over-tightening will crack the hinge or make the lid impossible to open. On Dell Latitude E7440 hinges, the pivot is a riveted assembly; you can’t adjust it. If it’s loose, you need a new hinge. But before you buy one, check if the hinge is just gummed up with old grease and dust. A drop of light machine oil and working the hinge back and forth can sometimes restore enough friction to hold the screen.

Disassembled laptop hinge mechanism showing metal bracket and pivot point

Method 3: Repairing a Snapped Hinge Bracket

Magnesium alloy lid frames, like those in the HP EliteBook 840 G1, are light and stiff, but they’re brittle. A drop can snap the hinge mounting ear clean off. Welding magnesium is a non-starter for most shops. Instead, you can fabricate a new mounting point. I use a small piece of aluminum sheet, cut and drilled to match the hinge screw pattern. This plate is then epoxied to the lid frame, bridging the break. The key is surface preparation: sand the magnesium and aluminum with coarse grit, clean with acetone, and use a high-strength epoxy like JB Weld. Clamp for 24 hours. This repair is stronger than the original casting, but it adds a millimeter of thickness—usually not a problem, but check clearance before you commit.

Model-Specific Quirks and Workarounds

Not all business laptops are created equal. Here’s what I’ve learned from tearing down hundreds of these machines.

ThinkPad T440s/T450s: The Lid Insert Problem

These models use tiny M2 screws that thread into brass inserts pressed into the plastic lid frame. The inserts are notorious for spinning in place. The fix: remove the insert, scuff it with sandpaper, and epoxy it back into the hole. Don’t just glue the screw in—you’ll never get it out again without destroying the lid.

Dell Latitude E7450: Hinge Mounts on the Palmrest

The hinge screws into the magnesium palmrest frame. If those threads strip, you can’t easily replace the palmrest because it’s riveted to the motherboard tray. The workaround: drill out the stripped hole, tap it for an M3 screw, and use a slightly longer screw with a washer. You’ll need to clearance the bottom cover slightly. It’s a permanent modification, but it saves a $40 palmrest assembly.

HP EliteBook 840 G2: The Hidden Screw Under the Bezel

HP loves hiding screws under adhesive strips and rubber bumpers. On the 840 G2, the hinge screws are under the display bezel, which is held on by screws hidden under screw covers at the bottom corners. If you try to pry the bezel off without removing these, you’ll crack it. The HMM shows this, but the diagram is tiny. Use a heat gun to soften the adhesive on the screw covers, then pick them out gently.

When to Actually Replace the Lid (and How to Do It Cheap)

Sometimes the damage is too extensive. If the lid is cracked in multiple places, or the hinge mount area is completely shattered, epoxy won’t save it. But you still don’t need to buy a whole screen assembly. On most business laptops, the LCD panel is held in by a few screws and a display cable. You can buy a bare lid (often called a “back cover”) on eBay for $15-30. Transfer the panel, hinges, camera, and cables. It’s a 30-minute job. Just make sure the replacement lid comes with the brass inserts intact—ask the seller for a photo of the screw holes before you buy.

Preventing Future Hinge Failures

Once you’ve fixed the hinge, don’t set yourself up for a repeat. Lubricate the hinge pivot with a tiny drop of silicone grease—not WD-40, which attracts dust and dries out. Check that the lid opens smoothly without binding. If the hinge feels too stiff, loosen the nut an eighth of a turn. Stiff hinges transfer all the opening force to the mounts, which is what caused the failure in the first place. Finally, train yourself to open the lid from the center, not the corner. Corner-opening twists the lid and stresses one hinge more than the other. It’s a small habit that adds years to the chassis.

Frequently Asked Questions

Can I use super glue instead of epoxy?

No. Cyanoacrylate (super glue) has almost zero shear strength and will fail within days. The hinge experiences repeated mechanical stress every time you open and close the lid. You need a two-part epoxy like JB Weld that cures into a structural adhesive capable of handling shear and tensile loads. Super glue is for bonding flat surfaces, not filling gaps or rebuilding screw bosses.

My laptop is still under warranty. Should I attempt this repair?

Absolutely not. Opening the laptop will void any remaining warranty. Hinge damage is often covered under manufacturer defects, especially if the laptop is less than a year old. Contact Lenovo, Dell, or HP support first. Only proceed with a DIY repair if the warranty has expired or if the damage is clearly from accidental drops (which isn’t covered anyway).

What if the hinge is so stiff it cracked the lid?

This is a common failure on the HP EliteBook 840 G1 and G2. The hinge itself is too tight from the factory, and over time it snaps the plastic lid. You need to address both problems. First, loosen the hinge nut slightly to reduce the tension. Second, repair the lid crack with epoxy and, if possible, reinforce it with a small metal plate. If you only fix the lid without loosening the hinge, it will crack again in the same spot.

Can I replace just the hinge bracket without removing the screen?

On most models, no. The hinge bracket is screwed to the lid from the inside, under the bezel. You’ll need to remove the bezel to access those screws. However, on some Dell Latitude models, the hinge bracket is part of the base assembly and can be replaced from the bottom without touching the screen. Check your model’s service manual to be sure.

This repair is one of the most common in my shop, and it’s almost always avoidable with a little care. The next time your screen starts wobbling, don’t reach for your wallet—reach for your tools. And if you’re dealing with a machine that has a cracked palmrest from the same hinge stress, that’s a topic for another teardown.

How to Fix a Loose Laptop Hinge Without Replacing the Screen Assembly

You crack open your ThinkPad T480 to double-check a schematic, and the left hinge groans like a rusted gate. The screen wobbles. You press down on the palm rest to steady it, and the bezel starts peeling away at the bottom corner. A loose hinge on a business-class machine isn’t just annoying—it’s a structural failure in slow motion. The hinge itself is a steel pin spinning in a friction bracket, but the real culprit is almost always the anchor points: those tiny brass inserts molded into the plastic display back or the magnesium palm rest. When they rip free from their plastic bosses, the hinge loses all torque, and the whole assembly flexes. On a ThinkPad T series, a Latitude 7000, or an EliteBook 800, this is a known weak spot, and the official solution is a new lid or palm rest. But if you’ve got a heat-set insert kit, some two-part epoxy, and a healthy disdain for throwaway engineering, you can often rebuild the original part—and make it tougher than it was from the factory.

Why Business-Class Hinges Fail (It’s Rarely the Metal)

The hinge mechanism—a steel knuckle with a friction clutch—is built to outlast the laptop. On a ThinkPad T480 or a Dell Latitude 7490, the hinge is rated for 30,000 open/close cycles. The failure point is the plastic housing. Manufacturers use brass threaded inserts that are heat-staked or ultrasonically welded into the display back cover or the base assembly. Over time, repeated stress, a single drop, or even thermal expansion and contraction cracks the plastic boss around the insert. Once that boss splits, the insert spins freely, and the hinge screw can’t hold torque. You’ll see the bezel separating, the hinge cover popping off, or the display lid lifting unevenly. The official repair manual from Lenovo or Dell will tell you to replace the entire lid assembly or palm rest. That’s a $150–$400 part, often with a weeks-long lead time. But if you’re working on a machine that still has a healthy motherboard and a good LCD panel, a mechanical repair is faster, cheaper, and keeps e-waste out of the bin.

Diagnosing the Damage: Insert vs. Boss

Before you mix any epoxy, you need to know what’s broken. Remove the battery and disconnect the AC adapter. On most business laptops from 2012–2019, the hinge screws are accessible after removing the bottom cover or the display bezel. On a ThinkPad X1 Carbon Gen 6, for example, you’ll need to peel back the adhesive bezel carefully with a plastic spudger. On a Dell Latitude 7490, the hinge screws are under the bottom cover. Once you can see the hinge, check each screw. If a screw spins without tightening, the insert is loose. If the screw is tight but the hinge still wobbles, the plastic boss around the insert is cracked or completely sheared off. A loose insert is the easier fix: you can often re-set it with a soldering iron and some fresh plastic. A broken boss requires rebuilding the anchor point with epoxy or a donor piece of ABS.

Tools and Materials You’ll Actually Need

  • Precision screwdriver set with Phillips #00 and #0 bits, plus Torx T5 for some Dell models.
  • Plastic spudger and picks—metal pry tools will gouge the magnesium frame.
  • Soldering iron with a flat tip, temperature-controlled if possible, set to 200–230°C for ABS.
  • Two-part epoxy (JB Weld PlasticWeld or Loctite Epoxy Plastic Bonder). Avoid quick-set cyanoacrylate; it’s too brittle for hinge stress.
  • Brass heat-set inserts (M2 and M2.5 are common; measure your screw first).
  • Isopropyl alcohol (99%) and lint-free wipes for surface prep.
  • Small files, sandpaper, and a rotary tool with a cutting disc for donor plastic.
  • Clamps or a heavy book for curing pressure.

Method 1: Re-Anchoring a Spun Insert

This works when the brass insert is intact but has stripped the surrounding plastic. Remove the screw and the hinge bracket. Grip the insert with needle-nose pliers and pull it out. If it’s still partially attached, use a soldering iron to heat the insert gently and soften the plastic, then extract it. Clean the hole with a small drill bit or file to remove loose debris. Roughen the inside of the hole with a pick. Mix your epoxy and fill the hole about halfway. Press the insert back into place, aligning it carefully—the insert must sit flush and square. Wipe away excess epoxy with isopropyl alcohol. Let it cure for the full manufacturer-recommended time (usually 12–24 hours) before reassembly. I’ve done this on a Dell Latitude E7470 palm rest and it held for three years of daily use.

Method 2: Rebuilding a Sheared Boss with Epoxy and a Donor Insert

When the plastic boss is completely gone, you need to rebuild the anchor point. This is common on HP EliteBook 840 G3 display backs where the hinge screws tear out. First, remove the display assembly entirely and work on a flat, grounded surface. Scrape away any remaining cracked plastic around the boss area. If you have a donor chassis from a dead unit, cut a section of plastic that includes a similar boss. Otherwise, you can mold a new boss using epoxy putty. For the donor method, shape the donor piece to fit the void, then bond it with epoxy. For the putty method, build a small dam around the area with tape, insert the brass insert into the putty, and mold the putty around it. Let it cure fully, then drill a pilot hole if needed. This is a permanent structural repair, but it requires patience and a steady hand.

Close-up of a technician's hands using a soldering iron to repair a laptop motherboard, illustrating the precision required for hinge anchor repairs.
Precision soldering techniques used for re-anchoring brass inserts are similar to those used in board-level repair.

Step-by-Step: Repairing a ThinkPad T480 Hinge Anchor

The T480 is a repeat offender. The left hinge screws into the magnesium palm rest, but the right hinge anchors into the plastic base cover. When the right hinge fails, the display lifts the entire corner of the laptop. Here’s the gritty repair sequence:

  1. Disassembly: Remove the external battery, bottom cover, internal battery, SSD, and system board. You need clear access to the palm rest’s underside. Follow the Lenovo Hardware Maintenance Manual for your model—it’s freely available on Lenovo’s support site.
  2. Inspect the damage: On the T480, the brass insert is often still in the screw boss but the boss itself is cracked. If the crack is clean, you can wick thin CA glue into it, clamp it, and then reinforce with epoxy. If the boss is shattered, proceed to the next step.
  3. Remove the old insert: Heat the insert with a soldering iron and pull it out. Clean the area thoroughly.
  4. Build a new anchor: Mix PlasticWeld epoxy and apply it around the hole, building up a small mound. Press the insert into the epoxy and shape the epoxy around it to mimic the original boss. Use a toothpick to add texture for better adhesion.
  5. Cure and reassemble: Let it cure for 24 hours. Reinstall the system board, hinge, and screws. Torque the hinge screw gently—just enough to hold. Over-tightening will crack your new boss.
A disassembled laptop with its internal components exposed, showing the hinge mechanism and the plastic base cover.
A full teardown is often necessary to access the hinge anchor points on business laptops like the ThinkPad T480.

Preventive Measures: Stop the Next Hinge from Dying

Once you’ve fixed one hinge, the others are on borrowed time. On any laptop from this era, I now do a preventive reinforcement. Remove each hinge screw, apply a tiny drop of blue threadlocker (Loctite 242), and re-torque. This prevents the screws from backing out, which is the first step toward insert failure. Also, lubricate the hinge clutch with a drop of silicone grease if it’s too stiff. A stiff hinge transfers more torque to the plastic anchors. On a Dell Latitude 7490, you can adjust the hinge tension slightly by loosening the nut on the hinge pin, but be careful—too loose and the display won’t stay upright. Finally, always open the lid from the center, not the corner. Corner-opening twists the entire assembly and accelerates boss fatigue.

When to Walk Away and Source a Replacement Part

This repair isn’t always viable. If the display back cover is cracked across multiple bosses, or if the magnesium palm rest has a fracture near the hinge mount, epoxy won’t save it. On an HP EliteBook 840 G5, the display back is thin aluminum, and once it tears, welding is the only permanent fix—not practical for most shops. In those cases, a used lid assembly from eBay or a refurbisher like Impact Computers is the smarter move. But for the common single-boss failure, a $10 epoxy kit beats a $200 lid. Just document your repair. If you sell the machine later, a buyer who sees a neatly rebuilt boss is less likely to panic than one who finds a glob of hot glue.

FAQ: Laptop Hinge Repair Without Screen Replacement

Can I use super glue to fix a loose laptop hinge?

No. Cyanoacrylate (super glue) is too brittle for the constant flexing and vibration a hinge experiences. It will fail within days. Use a two-part epoxy specifically formulated for plastics, like JB Weld PlasticWeld or Loctite Epoxy Plastic Bonder. These remain slightly flexible after curing and bond to ABS and polycarbonate, the materials used in most laptop chassis.

How do I know if the hinge itself is broken or just the plastic anchor?

Remove the hinge from the laptop and try to move it by hand. A healthy hinge should have smooth, consistent resistance. If it’s floppy, seized, or grinding, the metal hinge is damaged and needs replacement. If the hinge moves normally but the screw holes are stripped or the plastic around them is cracked, the anchor points are the problem. You can buy replacement hinges for most business models on sites like LaptopScreen.com.

Will this repair work on a consumer laptop like an IdeaPad or Inspiron?

It can, but the success rate is lower. Consumer laptops often use thinner, lower-quality plastics and the bosses are smaller. The repair principles are the same, but the margin for error is tighter. Business-class machines like the ThinkPad T series and Latitude 5000/7000 have more durable internal frames, making them better candidates for this kind of mechanical refurbishment. That’s why we focus on them here at laptopdvdrw.com.

A person carefully disassembling a laptop with a screwdriver, focusing on the hinge area.
Patience and the right tools are essential when working on fragile plastic components.

Building a Repair Hub: What’s Next

This hinge fix is part of a larger philosophy: keeping 2012–2019 business laptops alive through component-level work. If you’re comfortable rebuilding a plastic boss, you’re ready to tackle other common failures on these machines—like replacing the DC-in jack on a Latitude E5470 without a new motherboard, or reflowing the Thunderbolt controller on a ThinkPad X1 Carbon. Each repair builds on the same skills: reading boardview files, understanding mechanical stress points, and sourcing the right parts. I’ll be covering those in upcoming articles, along with a guide to building a basic repair toolkit for under $100. If you’ve got a specific model that’s driving you crazy, leave a comment or send a photo of the carnage. I can’t promise a miracle, but I can promise an honest assessment.

The Hinge Crack-Up: Why Your Business Laptop’s Lid Is Wobbling

The Hinge Crack-Up: Why Your Business Laptop’s Lid Is Wobbling

Let’s talk about the <strong>laptop hinge assembly</strong>. It’s a simple mechanical joint that nobody thinks about until it starts misbehaving. On a ThinkPad T-series, a Dell Latitude, or an HP EliteBook, a loose hinge isn’t just a minor annoyance. It’s a structural time bomb. That wobble you’re feeling? It’s the sound of brass threaded inserts slowly being wrenched out of their plastic or magnesium housings. Ignore it, and you’ll graduate from a quick, satisfying fix to a full base-chassis replacement. We’re not just talking about a floppy screen here. We’re talking about saving a machine that still has years of productive life left from a completely avoidable death.

Close-up of a technician's hand tightening a screw on a disassembled laptop hinge mechanism

Diagnosing the Real Problem: Loose Screws vs. Broken Mounts

Before you start squeezing epoxy everywhere, figure out what’s actually broken. A loose hinge usually means the screen flops back, there’s way too much play, or you hear a nasty cracking sound when you adjust the angle. The hinge itself—that steel bracket with the friction sleeve—is almost never the culprit. It’s a tough piece of metal. The weak link is where that metal meets the chassis. You’ve got two possibilities: the screw threads inside the brass insert are stripped, or the entire brass insert has ripped free from the plastic boss in the palm rest or lid. Stripped threads? You’ll be done in five minutes. A ripped-out insert? That calls for a steady hand and a proper chemical bond.

The “Tighten It Down” Test

Open the lid to 90 degrees and give the screen a gentle rock. Watch the hinge bracket’s base. If the metal bracket moves but the screw head doesn’t, the screw is loose. Easy. But if the bracket and the screw move together, and you see the surrounding plastic flexing or hear a gritty grinding noise, those brass inserts are spinning in their graves. That’s a different beast. Cranking down on a screw in a stripped boss will just chew up whatever plastic is left. For a quick check on a ThinkPad T480 or Latitude 7490, pop the bottom cover off and look for a gap between the hinge bracket and the magnesium frame. Even a 0.5mm gap means the screw is already backing out.

Tools and Materials for a Non-Destructive Repair

You’re not fixing a garden gnome. Leave the superglue and baking soda in the kitchen drawer. For a laptop hinge, you need a two-part epoxy that’s actually designed for metal-to-plastic adhesion. I reach for Loctite EA 9461 or a JB Weld PlasticWeld variant. You’ll also want 99% isopropyl alcohol, a set of precision tweezers, a plastic spudger, and a magnetic screw mat. Trust me on that last one—M2 and M2.5 screws have a way of teleporting into the deepest pile of the carpet. A heat gun is handy for softening old threadlocker, but it’s not strictly necessary.

Disassembled laptop base with hinge brackets exposed and tools nearby

Step-by-Step: Re-Anchoring a Stripped Hinge Boss

This is the repair that separates a real refurbisher from a parts-swapper. You’re going to rebuild that plastic anchor point. First, pull the battery and hold the power button down for ten seconds to drain any residual charge. Disconnect the display cable—and on many HP EliteBooks, pay attention, because the connector has a little locking bar that flips up instead of a pull-tab. Yank it and you’ll be sorry. Once the display assembly is off, you’ll see the damage. It’s usually a cracked cylinder of plastic with the brass insert still clinging to the hinge bracket.

Clean the area like a surgeon. Isopropyl alcohol, and lots of it. Any fingerprint oil will make the epoxy delaminate later. Mix your epoxy and use a toothpick to trowel it into the crater where the boss used to live. Press the hinge bracket back into place, making sure the brass insert is sitting in its new epoxy bed. Now, here’s the workshop trick: don’t crank the screw down yet. Just place it lightly to hold alignment, leaving a 1mm gap. Let the epoxy cure completely—I’m talking a full 24 hours for maximum shear strength. Only then do you torque the screw. This way, you’re creating a solid, threaded block of epoxy around the insert, not just gluing a screw into a hole.

When the Lid-Side Mounts Fail

The lid side is a bit more nerve-wracking. Those brass inserts are often heat-staked into the thin plastic of the display back cover. If you hear cracking near the screen corners, stop what you’re doing. The repair concept is the same, but you have to protect the LCD panel from epoxy fumes and any pressure. Slip a thin silicone mat between the panel and the back cover. If the plastic boss is completely obliterated, you might need to fabricate a new anchor point with a scrap of ABS plastic and some solvent welding. But for most business machines, a careful epoxy job will outlast the rest of the laptop.

Why “Just Replace the Palmrest” Is a Waste of a Good Chassis

Manufacturers and their authorized service centers love to quote a full palmrest replacement for a stripped hinge mount. On a Dell Latitude 5400, that’s a $150 part and an hour of labor to move over the motherboard, keyboard, and trackpad. It’s also a complete waste. The palmrest is the laptop’s spine. Replacing it introduces a dozen new risks: cross-threading other screws, pinching antenna cables, or getting a “refurbished” part with its own hidden stress fractures. A proper epoxy repair, done with a watchmaker’s patience, keeps the original factory fit and avoids the cascade of headaches that come with a full teardown. This is the whole point of keeping pre-2020 business machines alive: fix the failure, not the whole assembly.

Preventative Measures: Torque and Threadlocker

You’ve fixed the hinge. Now make sure it stays fixed. The root cause is usually cyclical loading. Every time you open the lid, you’re applying torque to those hinge screws. Over thousands of cycles, they just back out. The fix is a tiny dab of low-strength threadlocker—specifically, purple Loctite 222. Do not, under any circumstances, use blue or red. You’ll strip the screw head the next time you need to take it apart. If the model allows it, you can also adjust the hinge tension. Some ThinkPad hinges have a tension nut you can loosen a fraction of a turn. Reducing the force needed to open the lid directly reduces the stress on your newly repaired mounts.

Applying threadlocker to a small laptop hinge screw with a precision applicator

When the Hinge Itself Is the Culprit

It’s rare, but sometimes the hinge mechanism seizes up. The metal-on-metal friction joint can corrode or gall, especially if a previous owner baptized the keyboard with coffee. A seized hinge will rip your beautiful new epoxy mounts right out. To test it, pull the hinge off the laptop and try to move it with pliers. It should articulate smoothly with consistent resistance. If it feels gritty or locks up, you need a replacement hinge. For pre-2020 EliteBooks and ThinkPads, these are still easy to find as new-old-stock on electronics supplier sites. The part number is usually stamped right on the bracket.

FAQ: Loose Laptop Hinge Repairs

Can I use superglue and baking soda to fix a laptop hinge mount?

Technically, yes. But it’s a temporary bodge I wouldn’t trust on a machine you depend on. Cyanoacrylate has terrible shear strength and gets brittle with age. The baking soda makes it cure fast, but the result is a porous, crumbly mess. It might hold for a few weeks of light use, but the constant stress of opening and closing the lid will crack it. A proper two-part epoxy or a plastic welding kit is the only repair that actually restores the mount’s structural integrity.

My screen bezel is cracked near the hinge. Can I just glue it?

You can, but the crack is a symptom, not the disease. The hinge mount underneath has likely broken free and is pushing against the bezel. If you only glue the bezel, the loose hinge will keep flexing and crack your new glue joint. You have to open the display assembly, re-anchor the hinge mount to the lid, and then repair or replace the bezel. On a Dell Latitude, the bezel is often a cheap, snap-on part that’s worth replacing entirely if the clips are broken.

Does this repair work on a 2-in-1 or Yoga-style laptop?

It’s much riskier. 2-in-1 hinges are a nightmare of complexity, with multiple pivot points and tightly routed display and digitizer cables. The torque needed to hold the screen in tablet mode puts enormous stress on the mounts. A DIY epoxy repair on a 360-degree hinge is likely to fail quickly. For these models, a broken hinge mount almost always means a full palmrest or lid replacement. That’s why I generally tell business users to stick with traditional clamshell designs if they care about long-term repairability.

What torque setting should I use for hinge screws?

For the M2 and M2.5 screws common in ThinkPad T-series and Dell Latitude hinges, you’re looking at 1.5 to 2.0 kgf·cm. That’s well below what most adjustable torque drivers can even register, so the practical advice is this: tighten until the screw head makes firm contact with the hinge bracket, then add no more than a 1/16th of a turn. If you’re using fresh threadlocker, the screw will stay put without needing to be cranked down.

Next Steps for Your Fleet

If you’ve successfully re-anchored a hinge mount, you’ve just pulled a machine back from the scrap heap and picked up a skill that applies to nearly every business-class laptop from the last decade. The next logical step is to get comfortable with the display assembly itself. Once you’re confident removing the lid and separating the bezel, you can tackle the other common failure point on these aging workhorses: the LCD cable. A flickering screen or intermittent backlight is often misdiagnosed as a dead panel, when it’s really just a fatigued eDP cable in the hinge channel. That’s a $15 fix that follows the exact same disassembly path you just mastered.

How to Fix a Loose Laptop Hinge Without Replacing the Screen

A loose hinge is the slow, grinding death of an otherwise solid business laptop. You crack the lid, and the left corner lifts off the desk. The screen shimmies every time you type. Give it a few more weeks, and the bezel snaps, the display cable gets chewed up, and you’re staring at a flickering mess or a dead backlight. If you’re nursing a pre-2020 ThinkPad, Latitude, or EliteBook, a wobbly hinge isn’t just irritating—it’s a structural time bomb aimed straight at the display assembly. The upside? You almost never need to replace the screen. The downside? The factory design is basically a middle finger to anyone holding a screwdriver, and the fix demands patience, the right goop, and a stubborn refusal to follow the manufacturer’s “replace the entire lid” script.

This guide walks through the repair methods that actually stick on the magnesium-alloy and glass-fiber-reinforced plastic chassis you find in T-series, X-series, Latitude 5000/7000, and EliteBook 800 G5 and earlier models. We’ll dig into stripped brass inserts, fractured hinge mounts, thread-locking compounds, epoxy reinforcement, and the torque numbers that keep everything cinched down without cracking the bezel. If you’ve ever tightened a hinge nut only to feel it spin uselessly inside the plastic, you already know exactly why this matters.

Close-up of a laptop hinge mechanism with brass inserts visible

Why Laptop Hinges Fail on Business Machines

On a ThinkPad T480 or a Dell Latitude 7490, the hinge itself rarely dies. The metal arm and friction sleeve are almost always fine. The real culprit is the mounting point—that little threaded brass insert heat-staked into the plastic palmrest or lid frame. After a few thousand open-close cycles, the plastic around the insert just gives up. It fatigues. The insert starts spinning, then pulls out completely, and suddenly your hinge is a lever prying against the display bezel every time you adjust the screen.

Magnesium-alloy frames—common in ThinkPad T-series and EliteBook 800 series—fail a bit differently. The threaded holes in the magnesium can strip if some ham-fisted tech over-torqued the screws during a previous repair. Magnesium is strong but brittle; it doesn’t bend like plastic, it cracks. Once those threads are gone, the screw has nothing to grab, and the hinge works itself loose within weeks.

Pre-2020 models are especially worth saving because they still have socketed RAM, replaceable Wi-Fi cards, and panels that aren’t glued to the lid with factory adhesive. The hinge mount is often the only thing standing between you and another three years of service from a machine that cost $1,500 new. The repair is absolutely worth the effort, but you need to know what you’re actually fixing before you reach for a screwdriver.

Diagnosing the Real Problem: Mounts, Inserts, and Threads

Before you start mixing epoxy or ordering a new palmrest, open the machine and figure out exactly what’s loose. On most business laptops, the hinge attaches to the bottom chassis with two or three screws and to the display rear cover with another two or three. The screws thread into brass inserts that are either heat-staked into plastic or tapped directly into a magnesium frame.

Here’s how to spot the three most common failure modes:

Spinning Brass Insert in Plastic

You turn the screw, and it never tightens. The insert just rotates inside the plastic boss. This is the classic failure on Dell Latitude 5000/7000 series and consumer-grade plastic chassis. The plastic around the insert has cracked or stretched. The insert itself is fine, but it has nothing to grip. The fix means pulling the insert, rebuilding the plastic boss with epoxy, and seating it back in.

Stripped Threads in Magnesium Frame

The screw turns but won’t catch. The insert is intact, but the internal threads are gone. This happens on ThinkPad T-series and X-series magnesium frames when screws get over-torqued. The fix is either a slightly larger self-tapping screw (M2.5 instead of M2, for example) or a thread-repair insert like a Helicoil if you have the space and skill.

Cracked Hinge Mount (Plastic or Magnesium)

The entire boss or mounting point has fractured away from the frame. This is the worst-case scenario and usually demands epoxy reconstruction or a replacement palmrest. On magnesium frames, JB Weld can sometimes rebuild the mount if you’re careful with the shaping. On plastic, a two-part plastic epoxy and some fiberglass mesh can create a repair that’s stronger than the original.

Close-up of a laptop hinge screw and mounting point on a circuit board

Tools and Materials You’ll Actually Need

Skip the generic “laptop repair kit” from the big-box store. Those kits are packed with bits that’ll cam out and strip your screws. Here’s what you need for hinge work on business machines:

  • Precision screwdriver set with JIS bits: ThinkPad screws look like Phillips but they’re JIS (Japanese Industrial Standard). A Phillips driver will strip them. Get a proper JIS set—Vessel or Moody Tools are the real deal.
  • Torx T5 and T6 bits: Dell and HP love these for hinge screws.
  • Two-part epoxy (JB Weld or Loctite EA 3463): For rebuilding plastic bosses. JB Weld Plastic Bonder works well on polycarbonate blends. For magnesium, use original JB Weld or a metal-filled epoxy.
  • Thread-locking compound (Loctite 242 or 243): Blue, medium-strength. Not red. Red requires heat to remove, and you’ll melt the plastic before the threadlocker lets go.
  • Isopropyl alcohol (99%): For cleaning surfaces before epoxy. Water content in 70% IPA can cause adhesion problems.
  • Small clamps or rubber bands: To hold epoxy repairs while curing.
  • Replacement screws: If the originals are stripped, get a kit with M2, M2.5, and M3 screws in various lengths. Stainless steel preferred.
  • Plastic pry tools: For opening bezels without cracking them. Metal spudgers will leave marks and stress fractures.

Step-by-Step: Repairing a Spinning Brass Insert

This is the most common fix on Dell Latitude E7000 and 5000 series, as well as older ThinkPad T-series with plastic palmrests. The insert has broken free from the plastic boss. Here’s how to fix it properly so it holds for years, not weeks.

1. Remove the Display Assembly

Disconnect the battery first—always. Then remove the hinge cover, disconnect the display cable and antenna wires, and unscrew the hinge from the base. On ThinkPads, the hinge screws are often under the keyboard bezel. On Latitudes, they’re usually accessible from the bottom after removing the bottom cover. Take photos of cable routing before you pull anything apart; you’ll thank yourself later.

2. Extract the Spinning Insert

If the insert is still partially in the plastic but spinning, you need to get it out without destroying the boss. Heat the insert gently with a soldering iron (touch the iron to the insert, not the plastic). The heat will soften the surrounding plastic just enough to pull the insert out with needle-nose pliers. Don’t overheat—you want to soften, not melt. If the insert has already fallen out, skip this step.

3. Rebuild the Boss

Clean the hole and the insert thoroughly with 99% isopropyl alcohol. Mix your epoxy. For a plastic boss, use a plastic-specific epoxy like JB Weld Plastic Bonder. Fill the stripped hole about halfway, then press the insert back in. Epoxy will squeeze out around the insert—that’s good. Clean the excess from the top so the hinge sits flush, but leave a fillet around the base of the insert for reinforcement. Let it cure fully (usually 24 hours) before reassembly.

4. Reassemble with Thread-Locker

When reinstalling the hinge screws, apply a small drop of blue Loctite to each screw thread. This prevents the screws from backing out over time due to vibration and repeated lid movement. Don’t over-torque—snug plus a quarter turn is plenty. Over-tightening is what caused the failure in the first place.

Person repairing a laptop hinge with a screwdriver

Fixing Stripped Threads in Magnesium Frames

ThinkPad T480, T480s, and X1 Carbon models use magnesium alloy for the palmrest and lid. When the hinge screw threads strip out of the magnesium, you can’t just fill the hole with epoxy—the screw needs metal-to-metal engagement for proper grounding and structural integrity. Here are two approaches that work:

Method A: Oversized Self-Tapping Screw

If the original screw is M2 x 3mm and the hole is stripped, try an M2.5 x 3mm self-tapping screw. The larger diameter will cut new threads into the magnesium. This is the quickest fix and works well on T480 and T480s models where there’s enough material around the boss. Be careful not to over-torque—magnesium is brittle and will crack if you force it. If the screw doesn’t catch after two turns, stop and use Method B.

Method B: Thread Repair Insert

For a more permanent fix, use a thread repair kit like Helicoil or Time-Sert. This involves drilling out the stripped hole, tapping new threads, and installing a stainless steel insert. The insert provides stronger threads than the original magnesium. This is the gold-standard repair but requires precision and space—not always possible on thin Ultrabook frames. On an X1 Carbon Gen 6, the lid is too thin for a Helicoil, so you may need to replace the lid assembly or use a creative epoxy solution.

Reinforcing Cracked Hinge Mounts

When the plastic or magnesium around the hinge mount has actually cracked, you’re dealing with structural failure. Tightening the screw won’t help—the mount will just crack further. You need to rebuild the area around the mount.

For plastic frames, use a two-part plastic epoxy and, if possible, embed a small piece of fiberglass mesh or a thin metal washer into the epoxy for reinforcement. Build up the area around the boss, let it cure fully, then drill a pilot hole and reinstall the screw. This creates a reinforced mount that’s often stronger than the original.

For magnesium frames, JB Weld original formula works well. Clean the area aggressively with isopropyl alcohol and a wire brush to remove any oxidation. Build up the cracked area, and if the boss is completely broken off, you can sometimes reconstruct it using a sacrificial screw coated in release agent (cooking spray works) as a form. Thread the screw into the broken boss piece, apply epoxy to the fracture, and clamp it in place. Once cured, remove the screw and you have a functional threaded mount.

Preventing Hinge Failure on Refurbished Machines

If you’re refurbishing a fleet of ThinkPads or Latitudes, hinge failure is a predictable problem. Here’s what I do on every machine before it goes out:

  • Loosen and re-torque hinge screws: Factory torque is often inconsistent. Back each screw out, apply a tiny drop of blue Loctite, and re-tighten to 2.5-3.0 kgf-cm. A torque screwdriver is worth the investment if you’re doing volume.
  • Lubricate the hinge mechanism: A dry hinge requires more force to move, which transfers stress to the mounts. A small drop of silicone-based lubricant on the hinge friction surfaces reduces operating force without making the hinge floppy.
  • Check for early-stage cracking: Use a magnifying glass or macro lens to inspect the plastic around each hinge mount. Hairline cracks are the first sign of failure. If you catch them early, a thin layer of epoxy over the crack can prevent propagation.
  • Educate the user: Most hinge damage comes from opening the lid from one corner instead of the center. A small sticker or a note in the setup guide can save you a warranty repair.

When You Actually Do Need to Replace the Screen (or Lid)

Sometimes the hinge mount is too far gone. If the display rear cover is cracked around the hinge mount, you can sometimes swap the panel into a used lid assembly from eBay. This is cheaper than a full screen replacement and keeps the original panel. On ThinkPads, the lid assembly (including hinges and cables) is often available as a single FRU for $40-80. On Latitudes, you’ll usually need to buy the rear cover and hinge set separately.

If the panel itself is damaged—cracks, dead pixels, backlight bleeding from pressure—then yes, you’re replacing the screen. But a loose hinge alone rarely damages the panel unless it’s been ignored for months and the bezel has cracked and pressed into the LCD. Catch it early, and you’re looking at a $10 epoxy fix instead of a $100+ panel replacement.

Frequently Asked Questions

Can I just use super glue instead of epoxy?

No. Cyanoacrylate (super glue) is brittle and has poor gap-filling properties. It will fail within weeks under the repeated stress of opening and closing the lid. Two-part epoxy is the only adhesive that provides the structural strength and fatigue resistance needed for hinge repairs. JB Weld or Loctite epoxy specifically designed for plastics are the minimum standard.

How long will an epoxy hinge repair last?

When done correctly—proper surface preparation, full cure time, and thread-locker on reassembly—an epoxy hinge repair can last the remaining service life of the machine. I have T440s and Latitude E7450 units that were repaired three years ago and are still solid. The key is not rushing the cure. 24 hours minimum at room temperature. Heat-curing with a hair dryer can accelerate this, but don’t exceed 60°C or you risk warping plastic parts.

Is it safe to drill into a magnesium laptop frame?

Yes, but with caution. Magnesium is soft and drills easily, but the dust is flammable and the chips are sharp. Wear eye protection, work in a well-ventilated area, and keep a vacuum nozzle near the drill point to capture chips immediately. Do not use water or coolant—magnesium reacts with water. A dry drill at low speed (500-800 RPM) with a sharp HSS bit works best. Clean all chips thoroughly before reassembly to prevent short circuits.

Why does my laptop hinge keep coming loose after I tighten it?

If you tighten the screw and it holds for a few days or weeks before loosening again, you’re dealing with one of two problems: either the threads are partially stripped and the screw is slowly backing out under vibration, or the plastic boss is cracked and flexing. In either case, simply re-tightening won’t fix it. You need to address the root cause—thread repair or epoxy reinforcement—and use a thread-locking compound to prevent future loosening.

This is the kind of repair that separates a parts-swapper from someone who actually understands the machine. The manufacturers don’t want you fixing hinge mounts—they want you buying a new palmrest assembly or a whole new laptop. But on a T480 with an 8th-gen i5, 16GB of RAM, and a fresh battery, a $10 epoxy repair that takes an hour is absolutely the right call. That machine has years left in it, and now the hinge won’t be what kills it.